Dave’s Quick Print has consistently provided top-shelf customer service since job one! Print quality is superb – it’s obvious the DQP operators are invested in their craft. This pairing of high caliber service and printing is matched by their consideration for rapid deadlines and fixed budgets.
When it is time for our production or promotional material to be printed, there is no question who we use. Dave’s Quick Print delivers a quality product and a high level of service which helps our company drive sales and be competitive.
There is a consistent issue in printing with deep / dark blue tones as printed on the sheet and compared to the colour specified on the designer’s screen.
CMYK vs. RGB
The issue arises from the core difference between CMYK and RGB colour spaces. To clarify; RGB stands for Red, Green, Blue, which are the primary colours of light, and used to create the images you see on your monitor, tv, etc. RGB is an additive colour space, which means that colour will become brighter when more light is added. When all three primaries are combined at full intensity, white is created. RGB is measured typically from 0-255 on all three values. With black being 0R/0G/0B and white being 255R/255G/255B.
CMYK (Cyan, Magenta, Yellow, Black), conversely, is a subtractive colour space. When no ink is present the “colour” is at its brightest, because only the brightness of the paper shows through. As ink is added to the sheet, the paper brightness is dimmed until it is eventually black. CMYK is typically measured in a percentage of coverage, from 0C/0M/0Y/0K to 100C/100M/100Y/100K.
Photo Credit: Answers.com
What this means, in the end, is that the two methods will be able to produce many of the same colours, but there will be some on the fringes that will not be possible. We see this most often in the deep and bright blue colours.
When you design your project on your computer screen, and you want to see a bright blue colour, you may be tempted to choose the brightest blue available to you, which would be 0R/0G/255B. The problem you would find, is that any time you use a high value primary from either space without balancing them with the other primaries, you will find yourself “Out of Gamut”. This means that while the colour may display beautifully on your screen, you are looking at a colour that cannot be reproduced on the page.
The greatest bias between the two is actually along the green colour axis, fortunately, 255 G is such a bright, slime green that it is rarely used in design elements. Deep Blue or “Reflex Blue”-style colours in the Pantone Colour Chart are far more commonly requested.
What Can Be Done?
Some design software will have gamut warnings built in. They are not perfect, as different printers will have different equipment with different fringe gamut colours. However, if Photoshop doesn’t give you a colour gamut warning, you have better odds of seeing your colour represented on the page correctly.
To check for gamut warnings, select your colour and view it in your software’s colour picker. Typically a small warning sign will appear next to colours that are out of gamut (see above for the Photoshop version of this warning). In the example above, there is a small patch of colour underneath the warning sign that is clickable and will substitute the colour you have picked in your palette for a similar colour that is within the print gamut.
Another option is to reason out your colour choices. If you choose a blue that is built from 100% Cyan with 90% Magenta to give it more depth, odds are your colour is going to print in purple. What you are seeing on screen is an RGB representation of a CMYK colour build, and that is not always an accurate view.BE AWARE: small desktop inkjet printers use a different type of ink with a different shade of Cyan Magenta and Yellow than large production machines, and have different RGB to CMYK drivers built in to them and therefore cannot be trusted to proof your colour.
Finally, if you are doing a lot of design for print, you can have an RGB monitor calibrated to display the CMYK gamut as best possible. This is the best way to ensure that your colours are being selected properly, though this is typically a paid service, and as before, CMYK gamut can vary slightly from printer to printer.
At the printing stage, it is sometimes possible to correct these issues by lowering the print density of a colour. We prefer to save this practice for emergency use only, as this is a global change, and can make faces appear too yellow or green when the magenta levels are lowered. This method also will not change the amount of magenta in your blue, but the intensity of the magenta used in the entire project. Therefore, lowering the density will not necessarily create the desired colour, but will bring it somewhat closer, though at the expense of the rest of the piece.
Best Practices
The best practice is to start your job in CMYK, and if you have RGB images, convert them early and be aware of the CMYK values used to create the colours. If you see a lot of Magenta in your Blue build, consider bringing it back a bit. As an example, when trying to get a nice deep blue for the Winnipeg Blue Bombers, we look for about 65%-70% Magenta with 100% Cyan.
Also don’t forget that every monitor is different. What you see on your screen will not always be exactly the same as what the person on the other side of your email will see.
If you are ever unsure, always feel free to ask for a printed sample to confirm that your finished piece will match your expectations. We are always happy to print a copy from one of our digital machines to check colour. Upon request, we can even use the machine and paper that your job will be done on to ensure the highest accuracy possible. If your project is going on one of our larger offset presses, we can also schedule a “press-check” so you can come down and see the first sheets of your project come off the machine. As always, we welcome questions and feedback, so don’t hesitate to contact us.
Matt Gemmell is the Art Room Supervisor at Dave’s Quick Print and has been in Prepress and Design for over 10 years.
A successful “first year in business” milestone is a monumental accomplishment for any company. Locally owned and operated print shop Dave’s Quick Print is no exception!
On May 1, 2012 the company celebrated its first anniversary under the new ownership of Randy Premachuk and Randy Nelson. In April 2011, both were employed by Dave’s Quick Print’s parent company at the time, Printcrafters, who went into a sudden and unexpected receivership. When a deal to buy the entire Printcrafters’ group of companies by an outside party fell through, with the clock ticking and after some serious soul searching, the two Randy’s approached the receiver, Ernst & Young, about purchasing the assets of just Dave’s Quick Print. Dave’s Quick Print has continually been a successful operation under past ownerships since its inception over 35 years ago.
If Premachuk and Nelson were able to resume operations of Dave’s Quick Print immediately, they felt they would have a great chance to preserve at least 12 full time Manitoba jobs. Saving jobs is always an important consideration a Receiver has when evaluating the merit of this type of proposal. The awarding of the assets by a Provincial judge began an exciting journey of twists and turns.
Today, Dave’s Quick Print has 20 full time employees on staff (including a majority of the original staff). “As owners we understand that employees are the lifeblood of any successful venture,” said Nelson. “We are thrilled with our team and the quality of work we produce. Our staff is friendly, dedicated, knowledgeable and experienced (average length of service is 15 years)”.
In December 2011, the operation moved to an 8660 square foot office / production facility at 1650 Field Street. Coincidentally, it is the exact same location Dave’s Quick Print held from 1996 – 2009. “It was good karma to find a place we were very familiar with,” stated Premachuk. “Prior to moving in we made extensive renovations to the facility with a significant amount of staff input so it would be a fresh start for everyone. We wanted everyone to feel proud, comfortable and excited about our special opportunity.”
Among their biggest highlights in year one was securing a print partnership deal with the Winnipeg Jets. “We knew from day one when the Jets return was announced we wanted to be a part of the history,” said Premachuk. “We had a great working relationship with the Manitoba Moose for a number of years and it was a fun, exciting and smooth transition into working with the Jets.”
Dave’s Quick Print is a Manitoba based company and prides itself on being a good corporate citizen within the community.
For more information please contact Managing Director Randy Premachuk at 204.223.4144 or Managing Director Randy Nelson at 204.333.2550
We have a wide array of digital and offset equipment for small and large format printing. We provide graphic design services and have a complete bindery department that offers an extensive array of finishing features. We cater to the corporate community and are relied upon to produce a variety of products that require quality, accuracy and fast turnaround. We look after many projects of a sensitive nature which demand the utmost in confidentiality and security. Our consistency in meeting these challenges is why we continue to be a trusted and valued supplier to many organizations.
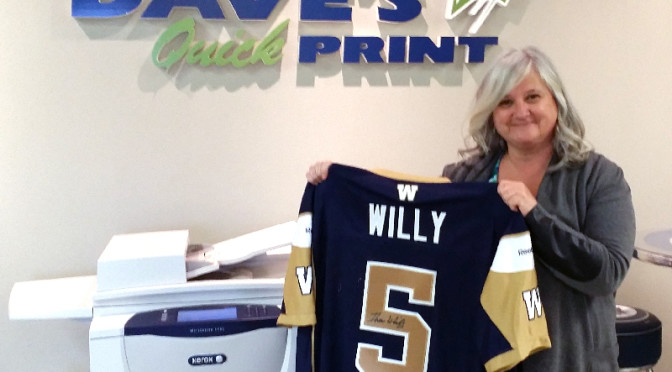
Erva has won a signed Drew Willy jersey. Congratulations, Erva! Stay tuned here or follow us on twitter @davesquickprint for more contest and draw announcements! Thanks to everyone that entered!
Your Winnipeg based print company providing world class products and service. Contact us for all your print needs including corporate promotions and mailings. We will meet your expectations and your budget. At Dave’s Quick Print "We take care of you".'